Posted on

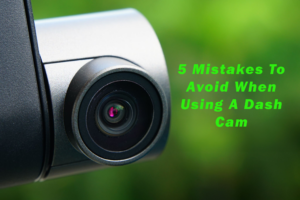
5 Mistakes to Avoid When Using a Dash Cam

5 Mistakes To Avoid When Using A Dash Cam

In an era where technology plays a pivotal role in enhancing safety on the roads, dash cams have become an indispensable tool for drivers. These compact devices record real-time footage of your journey, providing valuable evidence in case of accidents or disputes. While dash cams offer numerous benefits, using them incorrectly can lead to unintended consequences. To ensure you make the most of your dash cam, here are five common mistakes to avoid.

Poor Placement:

One of the most frequent mistakes users make is improper dash cam placement. Mounting the device too high, too low, or at an angle can compromise its effectiveness. Ideally, the camera should be positioned behind the rearview mirror, ensuring a clear view of the road without obstructing your vision. Take the time to carefully adjust the angle and height to capture a wide and unobstructed field of view.

Neglecting Regular Maintenance

A dash cam is not a one-and-done purchase. Like any electronic device, it requires regular maintenance to function optimally. Many users forget to check for software updates, leading to potential glitches or compatibility issues. Additionally, the lens can accumulate dust or smudges, impacting video clarity. Routinely clean the lens and check for updates to ensure your dash cam is ready to capture any unexpected events on the road.

Ignoring Local Laws and Privacy Concerns

A dash cam is not a one-and-done purchase. Like any electronic device, it requires regular maintenance to function optimally. Many users forget to check for software updates, leading to potential glitches or compatibility issues. Additionally, the lens can accumulate dust or smudges, impacting video clarity. Routinely clean the lens and check for updates to ensure your dash cam is ready to capture any unexpected events on the road.

Using Low-Quality Memory Cards

The reliability of your dash cam is heavily dependent on the quality of the memory card you use. Opting for a low-capacity or subpar card can result in recording failures, corrupted footage, or, in the worst-case scenario, a complete malfunction of the device. Invest in a high-quality, high-capacity memory card that is compatible with your dash cam specifications. Regularly check and replace the memory card to prevent data loss.

Overlooking Video Management

Some users focus solely on recording incidents but overlook the importance of proper video management. A full memory card can lead to overwriting important footage, rendering it useless when needed. Set up your dash cam to automatically loop over old footage or transfer critical files to another device. This ensures that crucial evidence is preserved, and you won’t miss capturing an incident due to a full memory card.

Conclusion

Dash cams are invaluable tools for enhancing road safety and providing crucial evidence in unforeseen circumstances. By avoiding these common mistakes, you can maximize the effectiveness of your dash cam, ensuring a safer and more secure driving experience. Stay informed, maintain your device, and drive confidently knowing that you have a reliable witness on board.

Posted on

5 Reasons To Upgrade Your Dash Cam

DVR camera on the windshield of the car close up

If you already own a dash cam, you’re likely familiar with its fantastic features that enhance driver safety. However, what you may not know is that your current dash cam could be outdated, with newer models offering better features that make it easier to share footage with loved ones, provide evidence to insurance companies or the police, and more.

Here are five reasons why it’s the perfect time to upgrade your current dash cam:

Enhanced Resolution

Like any video camera, dash cams record using specific video sizes, and higher pixel numbers indicate better video and image quality. Older dash cams may record in 480p or 720p, which is considerably lower than the capabilities of newer models. By upgrading to a higher resolution camera, such as 1080p, 1440p, or 4K, you’ll enjoy sharp, crisp images that won’t suffer from display issues. This ensures that the footage retains important details, such as license plates or faces, even when objects are far from the camera.

Improved Night-Time Recording

Driving at night can be more dangerous due to reduced natural light. While most dash cams offer low-light features to record in the dark, older cameras may produce grainy and barely visible footage that’s of little use to authorities or insurance providers. Investing in a dash cam with enhanced low-light recording capabilities allows you to capture more details in videos, even when driving on unlit roads. Brands like BlackVue, Nextbase, and Garmin offer excellent options with light sensor technology or Sony STARVIS image sensor technology for unrivalled night-time video recording.

Wi-Fi and Better Connectivity

Modern dash cams come equipped with built-in Wi-Fi connectivity, allowing you to effortlessly view footage on your smartphone or computer and transfer videos without removing the SD card from the dash cam. Some models, like those from BlackVue, take connectivity to the next level with the BlackVue Cloud. This suite of app-driven Live services enables users to remotely connect to their dash cams, check their cars, play video clips, back up data, monitor live journey progress, and access real-time location data.

Parking Mode and Hardwiring

If your current dash cam is older, it probably lacks a parking mode feature, meaning it won’t record when the engine is off due to power constraints. Newer dash cams typically include parking modes with features like impact detection and motion detection. This ensures continuous recording even when you’re away from your vehicle, providing peace of mind in capturing any unexpected incidents. To optimize the dash cam’s parking mode and ensure constant coverage, consider having it hardwired into your car. Hardwiring prevents the dash cam’s battery from draining and eliminates messy wires, freeing up your 12V connector for charging other devices.

Front and Rear Cameras for Expanded Viewing Angles

Leading dash cam brands now offer options for both front and rear cameras. Installing a dual-camera system provides a full 360-degree view (depending on the model), ensuring you never miss what’s happening ahead, beside, or behind you. BlackVue offers several models that include front and rear cameras as standard, making them an excellent choice for comprehensive coverage. Nextbase also offers rear cameras that can be combined with their front cameras, providing a broader perspective of the road. With these options, you’ll capture every important moment.

Posted on

G1W Dashcam Review

G1W Dashcam Review

G1W Review Summary

The G1W has been a best seller of ours for a long time now, so we’ve been putting one through its paces to see what makes it so popular! The G1W, available in either a smart blue or black finish, is our cheapest dashcam which makes it a great choice for many people looking for a car camera. But does low price, have to mean low quality?

Key Features

  • Our cheapest dashcam.
  • Full HD quality video (1920 x 1080) at 30fps.
  • 120° wide angle lens.
  • 2.7″ LCD screen.
  • Photo mode.
  • Motion detection.
  • G-sensor.
  • Micro SD cards up to 32GB (class 6).

Despite it’s budget price-tag, the G1W comes nicely packaged with everything you need to install it in your vehicle and start recording, except for a memory card. Although we’re currently offering one for free with the G1W at time of writing, which makes this camera exceptional value for money. Many people simply want a reliable dashcam, that records good quality video – no GPS, no wifi, no other bells and whistles – and in that respect the G1W is hard to beat.

It’s because of this that the market is awash with copies of this gem of a camera. Fakes often look identical, and may come with an even more appealing price tag, but deliver sub-standard performance in every respect. Always ensure that you purchase your dashcam from a trusted supplier to guarantee that you receive a genuine product.

Upon unboxing the G1W, the first thing that you notice is its huge screen. The rear of the camera is dominated by a 2.7″ LCD screen which makes it ever so simple to set up the camera and watch your videos. The screen is bright, with large icons which make it easy to read, and with a few chunky buttons at either side of it, it’s easy to navigate too. The menu options are simple, but effective, and shouldn’t cause anyone too many headaches in adjusting the camera’s settings to suit their needs.

On the front of the camera we find the lens, mounted centrally, which again makes installation and alignment that bit easier. We’d prefer the bezel around the lens not to be silver, as this is more obvious when viewed from outside the vehicle. If this is a concern for you, then the G1WH might be worth a look.

Alongside the lens in a small light which we’re led to believe will illuminate the road ahead at night, but unfortunately this isn’t the case. Lights on dashcams tend to be a bit of a gimmick which actually only serve to cause glare on the inside of the windscreen. Even infra-red lights, which are commonplace among budget dashcams, have the same effect.

Elsewhere on the G1W, we find a slot for the microSD memory card, a HDMI out port, an AV out port and a mini USB power connector. On the top of the camera we also find the power button, a button marked M and a slot to attached the suction mount. All-in-all the G1W is a fairly simple unit, but this is actually one of it’s strength. Often people are put off by the complexities of more advanced dashcams, and the G1W lends itself very nicely to those.

Installation is simple, with the suction mount clipping neatly and snugly into the slot on the top of the camera, enabling the camera to be attached firmly to the windscreen. When in place, it’s just 80mm from the base of the mount to the bottom of the camera so it still stays a compact and tidy unit. From this point the 3m power cable simply needs to be routed along the top of the windscreen, down the A pillar, around the dashboard and along to the cigarette lighter socket. Depending on your vehicle, this could be a 10-15 minute job, with the only tricky part being pushing the power cable into various gaps between trim to conceal it. The screen makes alignment simple and the camera can be up and running in no time at all.

The suction mount means that the camera can easily be detached from the windscreen for security purposes. We had hoped that the mount could be left in the car, so that the camera wouldn’t need to be aligned each time it was put back in place, but in our tests it is just too tricky to unclip the camera from the mount when it’s fitted behind your rear-view mirror. Although this does mean that the mount is a firm fit which will help to give a stable image.

We inserted a 32GB class 6 microSD card, capable of holding around 5 hours of 1080p footage, and set off for a drive. After 30 seconds, the screen turns off so as not to be a distraction to the driver but a small flashing LED shows that the camera is still recording which is a useful feature.

If required, a press of any button turns the screen on again, and while the camera is recording, a press of the M button locks the video being recorded at the time, keeping it safe from the loop recording feature. A key icon on the screen signifies this and means that you can retain any videos that you might like to refer to at some point. Keep in mind, that the more videos that you lock, the less room there will be on your memory card for new footage so it’s good practise to copy videos that you need to your computer from time to time and format your card to keep it in full working order.

Considering this is our cheapest dashcam, you might expect the image quality just to be so-so, but this isn’t the case. Daytime footage is crisp and clear with registration plates visible on vehicles in front and even passing vehicles in many cases. We’re genuinely impressed at the amount of details that the G1W captures, and feel that in the case of an incident, footage from this smart little camera would undoubtedly help to paint a clear picture of activity surrounding any incident.

In low-light conditions the G1W doesn’t captures as much detail, unsurprisingly so, but it does have a WDR mode which helps the camera to improve the image quality as much as possible. In our tests, while registration plates weren’t always legible at night, partly due to the reflection of our headlights on number plates, the footage still helped to show what was happening around us on the road.

So, the G1W is cheap and captures excellent video quality, so where’s the down side?

In terms of features, the G1W is limited, and could be improved with the inclusion of more advanced features such as GPS, but I’m sure we’d see the price increase accordingly. Build quality also doesn’t compare with more premium cameras, with buttons having a decidedly plasticy feel to them, but nothing feels sub-standard. Finally, the instruction manual leaves a lot to be desired, especially if you’re unfamiliar with dashcam terminology, but thankfully, as the camera is relatively simple and it’s default settings are adequate for many user, this needn’t be a deal-breaker.

So while some may see the G1W as an entry-level dashcam, don’t be fooled. While it’s not the smallest or most technologically advanced camera available, it records excellent footage and offers peace-of-mind for a bargain basement price.

G1W Dashcam Videos

Unboxing Video
Sample Footage

G1W Dashcam Downloads

Buy the G1W Dashcam Online

The G1W is available to buy online for only £42.99..


It’s up to the parent on how they introduce the dash cam but many parents offer their car (or buy a car) providing they use a car camera which can be viewed at any time. As the parent, you can view the footage of their driving and even see their speed and location on a map, providing your camera comes equipped with GPS. You can also see the g-forces being applied so you can identify quick and dangerous moves on the road! Quite a powerful tool for a parent!

You could argue that this is all rather big brother but if you love your kids and want them to be safe, this is a very effective way to ensure they drive safely and reduce the risk of having an accident.

Posted on

New Release: The Nextbase 122 Dash Cam

New Release: The Nextbase 122 Dash Cam

As part of the brand new series of Nextbase dash cameras, the Nextbase 122 dash cam is a clear winner as a highly practical and functional car camera. HD recording, parking mode, and more, all for a very low cost make it an ideal choice for younger, or new drivers.

Recording Quality

The Nextbase 122 records in an impressive 720p HD at 30 frames per second – enough to clearly capture road incidents in detail. Its 5-layer f1.6 lens provides a viewing angle of 120° to ensure that the whole road is covered with video footage in order to provide court admissible evidence instantly. The vehicle camera is completely compatible with a polarising filter, giving you to option to improve your recording quality through reducing or completely removing glare and reflections from your vehicles windscreen. These are some seriously impressive specs when compared against the price tag of this camera.

Design

The Nextbase 122 has the classic look and feel of a Nextbase camera, meaning a discreet installation which doesn’t distract you while driving is very possible. The newly designed mount uses a lower profile design and high strength neodymium magnets allowing you to easily place and remove the dash cam with just one hand. A standard 3m adhesive pad is used for fitting, and a suction pad is included. The power cable goes directly into the mount itself, leaving the car camera completely free from wires.

Nextbase 122 Features

Video Quality

The Nextbase video quality is sufficient for recording the road ahead of you in enough detail to use your footage as evidence. 720p @ 30fps HD Recording, alongside a 120° wide viewing angle ensure that your journey is covered.

Display

The Nextbase 122 uses a bright and clear high-resolution screen for easy menu navigation and playback. The display is 2″ in size which is slightly smaller than some of the previous models. This provides enough size to see the menu and recording screen while allowing the camera to have a slightly more discreet design.

Capacity

This dash cam will support up to a 32GB Micro SD card, for 4 hours of footage. Once this storage becomes full, it will automatically begin to overwrite the oldest footage to provide you with constant recording.

Footage which you don’t want to be overwritten can be saved as a manual recording.


Parking Mode

The Nextbase 122 features a new and improved intelligent parking mode which will automatically begin recording when motion or movement is detected around your parked vehicle.

This makes use of their new high precision G sensor to make sure that all possible events are recorded and locked away from being overwritten.

Free Cloud Access

Another feature new to the Nextbase range is their completely free MyNextbaseCloud service. This allows footage to be easily saved, viewed and shared online without taking up storage space on your SD card or computer.

What’s in the box

  • 122 Nextbase Dash Cam
  • Fitting tool
  • Adhesive mount
  • Suction mount
  • Usb cable
  • Car power cable
  • Quick start guide


Posted on

iPixi/Winycam V200HD Review

iPixi/Winycam V200HD Review

iPixi V200HD Review Summary

If you’ve read our review of the BlackVue DR550GW, you’ll know that we’re big fans of 2-channel dashcams here at Car Camera Shop. To you and me, that’s a dashcam that features both a front and a rear-facing camera. There’s no denying that having footage of activity on the road behind you as well as in front gives outstanding peace-of-mind. So we were excited to review the iPixi/Winycam V200HD and see how this smart looking dashcam performs.

Key Features

  • HD quality video (1280 x 720) at 30fps.
  • 120° (front) and 140° (rear) 2MP CMOS sensor.
  • Multi-lens to capture video from front and rear.
  • 3” LCD touch screen.
  • GPS maps for speed and location tracking.
  • G-shock sensor to detect sudden and severe movement.
  • Parking mode for protection when parked.
  • Adjustable adhesive windscreen mount.
  • MicroSD cards up to 32GB. 16GB card supplied.

Aside from the rear-camera, the other stand-out feature of the V200HD is the LCD touch screen. At 3″ in width, it’s the largest screen of any of our dashcams and is unique in offering touch screen capabilities. Despite the screen size, the front-facing camera unit isn’t too bulky. Larger than some other cameras, but still small enough to be concealed behind the rear-view mirror.

As you may have seen from our unboxing video, the V200HD comes well packaged with all the necessary components to get it up-and-running, including a memory card. The main unit is as small as it can be considering the 3″ screen, and is largely black, with ventilation holes around the sides to help disperse heat. On the front of the camera is the lens, surrounded by an LED ring. This glows red when the camera is recording but this can reflect in the windscreen, particularly at night, so thankfully this can be disabled in the menu settings. Apart from that, things are left simple, with three small LEDs on the rear to show you that the camera is powered up, recording and that the GPS has a signal. There is also a microphone and one solitary button that can be used to record manually, which is placed in a convenient position.

The touch screen is impressive and makes navigating through the cameras menus a breeze. It’s not as advanced as today’s smartphones, but the basic touch functionality works very well as is very well suited to the dashcam market. I powered up the camera before installing it to have a play with this unique feature and was flicking in and out of the menus in no time at all. Using straight-forward on-screen icons, navigation was intuitive and there was very little lag, meaning it wasn’t frustrating to use. It’s a minor detail, but some of the menus have spelling mistakes and grammatical peculiarities in them which hint at the V200HDs foreign heritage, as Winycam originated in Korea.

iPixi Winycam V200HD Dash Cam

The rear-facing camera is small and neat and connects to the main unit by a long cable. This enables the front, main camera unit to process images from both cameras. This means that when watching your videos, either on the LCD screen or using the software provided, the image can be flipped from front to back easily. This makes it easy to track activity around you as you either pass something of interest, or you get overtaken, for example.

Installation was easy, but slightly more time-consuming than some other cameras, due to there being three cables to find homes for. The first cable is for power, and this was simple to run around the windscreen, down the side of the dashboard and under the passenger seat to the cigarette lighter. The second cable was to connect the rear camera, and in my car, a Ford Focus, this was easily hidden behind the edge of the roof liner, the door surrounds and various bits of interior trim. The only minor complication came with leaving enough slack cable for the hatchback to open, but that didn’t look messy when the hatch was closed. The third cable is for the GPS unit which is, unusually but not uniquely, separate from the main camera unit in the V200HD. While some people prefer this as it allows the GPS receiver to be positioned where it can get the best signal, it does mean it’s an additional unit to mount in your vehicle. I tried this in several positions and it performed perfectly in all of them. Even when completely hidden behind the roof lining, it still captured my location accurately.

Mounting the main camera unit was also simple. The adhesive mount features a small ball joint and a tightening ring so it can be secured in place once it has been aligned. Once I had positioned it, neatly behind my rearview mirror, the adhesive stayed in place with no issues at all. The only problem I encountered was that the angle of my windscreen meant that the camera couldn’t point downwards as far as I would have liked. This meant that I captured slightly more of the sky than I would have liked to. This didn’t limit the amount of on-the-road action that I recorded, but it could have impacted the cameras brightness settings as it dims the overall image to compensate for the light from the sky, resulting in darker footage.

One other minor comment at this point would be that the adhesive pad was white, meaning that it was very visible from outside the car. Using black, grey or clear adhesive would have meant that the install was more discrete. The rear camera also mounted easily and neatly at the top of my rear windscreen and didn’t block my view at all when looking in the rear-view mirror.

Of all the cameras that I’ve tested, the iPixi V200HD was one of the most reliable and I never had any doubt that it would be working faultlessly. Upon starting it up, a voice message prompted me that “normal recording would now begin”, referring to the regular recording mode, as opposed to parking mode for example. At first I would check to see that all the correct functions had kicked in and that the camera was working as I wanted and it always was. Some other cameras, particularly budget cameras, work perfectly and then, for some reason, can throw a tantrum and stop doing what you expect. These complications can almost always be resolved, but they can sew a seed of doubt in your mind. With the V200HD, I never had that. I used the camera daily for over a month, as we feel that to really put a camera through its paces you need to use it over a prolonged period, and never had any issues at all. This peace-of-mind is compounded by the V200HDs ‘cut off voltage’ feature which means the camera can be left powered while you’re away from your vehicle for a long time, but eliminates the risk of it running your battery down completely. It will continue to record, in parking mode, until the voltage of your battery drops to a pre-defined level at which point it will turn itself off.

During everyday use, the V200HD recorded my speed and location very accurately with its GPS receiver, identified moments of significance such as heavy breaking or bumps with its G-sensor and switched automatically between the appropriate recording mode depending on whether I was driving or parked. To me, a good dashcam is one that can be installed, and largely forgotten about until the footage is required. I feel that this dashcam is a good example of that.

I would say that V200HD isn’t designed to be removed from your vehicle once it’s been installed. With three cables to disconnect and a mounting bracket that’s slightly tricky to reconnect in situ, this camera doesn’t lend itself to being taken out of the car overnight, for example. This will suit some people, who see the presence of a dashcam as a security measure, while it will be off-putting to others who may feel that a dashcam is an invitation for a smash-and-grab opportunist thief. Fortunately however, the Micro SD card slot is easily accessible and the card was easy to remove so that footage could be viewed on my PC.

Image quality is, without a shadow of a doubt, the most important factor with any dashcam and the iPixi V200HD scores well in this area. It’s not the best, and seems to struggle particularly in areas with rapid lighting changes, such as driving though tree shadows for example, but it’s perfectly adequate. At standstill, number plates are crisp and sharp but while in transit these can be more difficult to make out, depending on your speed in relation to other vehicles. This is often the case with dashcams and there is a trade off between cameras excelling is some areas of image capture but struggling in others. I think the V200HD has reached a good balance.

Most dashcams capture footage at thirty frames per second (fps), delivering smooth video that most people would be very happy with. The V200HD, splits this frame rate between the front and back cameras, meaning that the front camera delivers 20fps and the rear camera, just 10fps. To a tech purist, such as myself, this is a shame, as the footage appears every so slightly jerky. However, it doesn’t necessarily have a hugely detrimental effect on the cameras ability to capture the necessary footage in the case of an accident.

In order to view your footage in more detail than the LCD screen can offer, you’ll need to transfer it to your computer. The iPixi ‘WinyBBViewer’ software is only compatible with Windows so if you’re a Mac user you won’t be able to benefit from its features. You can still view your footage, but you won’t be able to access the location, speed and g-sensor data that your V200HD has gathered as easily. The software is simple to use and makes it easy to access all the data that you’ve captured. Videos can be easily flipped between the front and rear view, which really helps to paint a clearer picture of the activity around you, and simple tools for tweaking the image for the best view and for extracting incriminating videos and stills, make it really useful in the case of any incident.

So, if you’re after a dashcam with front and rear cameras, which limits you to just a handful of options, you could do a lot worse than the iPixi Winycam V200HD. While the image quality could be better, its many other features mean that it’s a very capable unit. The 3″ LCD touch screen is a unique and well implemented feature than makes the camera very user friendly, despite the complex featured that it offers, and once it’s been installed it can be largely forgotten about without any doubts as to whether it is performing as required.

Sample iPixi V200HD Videos

Unboxing Video

iPixi X100FHD Downloads

  • iPixi V200HD Software
  • iPixi V200HD User Manual
  • iPixi V200HD Installation Guide

Buy the iPixi V200HD Camera Online

The iPixi V200HD is available to buy online for only £249.99 which comes complete with the rear camera all the accessories you need to install it in your car and get up and running.

Posted on

iPixi/Winycam X100FHD Review

iPixi X100FHD


iPixi X100FHD Review Summary

The iPixi X100FHD (also called the Winycam X100FHD) is a unique camera with many features which make it stand out from the others. At £199.99 it’s priced at the top end of the range and has full HD, GPS mapping for speed and location tracking, a g-sensor to monitor impacts, parking protection, and a unique swivel lens allowing you to point the camera inside the car – a feature particularly useful for taxi drivers and driving instructors.

Key Features

  • Full HD quality video (1920 x 1080) at 30fps.
  • 130° wide angle lens with a 2MP CMOS sensor.
  • Rotating camera for front/rear recording.
  • GPS maps for speed and location tracking.
  • G-shock sensor to detect sudden and severe movement.
  • Parking mode for protection when parked.
  • Photo mode.
  • Adjustable adhesive windscreen mount.
  • MicroSD cards up to 32GB. 16GB card supplied.

The first thing we noticed when opening the box and unpacking the camera was that is felt like a sturdy and well built unit. The materials oozed quality and it was firmly put together. You get all the essentials in the box but no spare adhesive pads means there’s no backup in case you want to move the camera later. You can always get spare adhesive pads from eBay though if you need to.

The camera contains a single record button which is used to change the camera modes and manually lock a video file. There are 2 LED lights at the rear of the camera which are visible to the driver, one for power and another to signal it’s recording. The SD card slot is underneath the camera and there’s a front facing LED which flashed as you drive along. This light is very bright and overbearing at night but you can turn it off in the camera settings.

The installation process is simple. In our test we stuck the camera behind the rear view mirror so it’s tucked out of the way from the drivers’ view. Of course, this means that when you rotate the lens it will record the back of the mirror so if you need this feature you’ll need to mount the camera further down the window or to one side. However, always be mindful that you mount your camera in a safe and legal position.

Once installed, the iPixi X100FHD camera can be adjusted both up/down and left/right to make sure you get the best footage possible. The camera cannot be taken out of the car once it’s installed which means you can’t tuck it away when you’re on holiday or even taken it into the house to view the videos or change the settings. This means you need to take the memory card out of the camera and plug this into your computer instead which can be a little tricky, especially when it’s dark.

iPixi Winycam X100FHD Dash Cam

The camera has a nice voice guide system which tells you when it starts and ends recording, amongst other things. It’s nice to get the re-assurance that the camera is on and recording rather than having to check the LED lights to make sure it’s definitely working.

Like many cameras, the software and user manual is supplied on the camera itself, and accessed via the SD card. The software that controls the camera settings and allows you to view the video footage GPS and g-sensor data is only compatible with Windows. Therefore, we don’t recommend this camera if you’re not a Windows user since you won’t be able to change any settings (including the date and time) or view this additional video content.

The iPixi (or Winycam) X100FHD camera is very easy to use and setup. It automatically enters into parking mode once the camera hasn’t sensed movement for a few minutes and it automatically locks video clips when it senses an impact or sudden shock (via the built in g-sensor). If you want to manually lock a file as you’re driving along, simply press the one and only button on the camera. It really is very simple to use – once it’s in it just runs itself.

The most important factor when it comes to car cameras is the quality of the video – this is what ultimately counts when you need to rely on the evidence. The iPixi X100FHD records in full 1080p HD at 30fps. The video quality is on a par with other dash cams in this price range.

The rotating lens which allows you to flip the camera to face inside the car is a great feature for taxi drivers and driving instructors that would find recording inside the car useful. You will of course need to make sure to mount the camera in a position that will see in both directions. Normally, you would mount the camera behind the rear-view mirror to keep the camera out of the way, however, this will mean you won’t be able to make use of the rotating lens.

Changing the settings on the camera needs to be done with the supplied Windows software. You take the card out of the camera and insert it into your computer to load the software. Then, insert the card into the camera again (the camera will be in the car at this point) and the camera will update itself when you turn it on. This can pose a problem when updating the date and time of the camera. Firstly, you set the time using the software on your computer for a time in the future that you will insert the memory card into the camera. You then need to insert the memory card into the camera in your car at this set time.

At around the £200 price range, this iPixi/Winycam dash cam has a unique rotating lens and is very easy to use, it’s Windows only software and limited portability may limit its appeal to some.

Sample iPixi X100FHD Videos

Unboxing Video
Sample Footage

iPixi X100FHD Downloads

  • iPixi X100FHD Software
  • iPixi X100FHD User Manual
  • iPixi X100FHD Installation Guide

Buy the iPixi X100FHD Camera Online

The iPixi X100FHD is available to buy online for only £199.99 which comes complete with all the accessories you need to mount it in your car and get up and running

Posted on

Mobius ActionCam (Dash Cam Version) Review

Mobius ActionCam (Dash Cam Version) Review


Mobius Review Summary

The Mobius ActionCam is an all round action camera which comes with the basic dash cam features required to make it an ideal car camera. This includes loop recording, auto power on/off, range of car mounts, and auto recording amongst other things which turn this light and nimble action camera into the perfect dash cam.

Key Features

  • Full HD 1080p @ 30fps.
  • Loop recording, auto power on/off.
  • Photo mode.
  • Motion detection.
  • Range of mounts available.
  • MicroSD memory cards up to 32GB (class 6)

When you first hold the camera you realise just how small and light it actually is with an excellent build quality – it feels very strong and sturdy, more than enough to cope with even the worst drivers out there! It’s by far the smallest dash cam on the market and one of the cheapest. There’s no official box with the camera and there isn’t any instructions or software provided. However, you can download some Windows software to change the camera preferences and a PDF user manual created by third-parties (see download links below). Without the software, you can change the camera preferences by editing a text file on the memory card – it’s easy enough but can appear a little daunting at first.

The Mobius camera comes with lots of mounting options allowing you to mount it in the car with a suction or adhesive mount, depending on your preference. If you want to use the camera for other activities such as cycling or even snowboarding, you can purchase additional mounts. The camera mounts using a standard tripod thread which means you can use any mount with the tripod thread connection.

Mobius Action Camera

I’ve actually been using the little Mobius camera in my car for a few months and absolutely love it. During this time the manufacturer has released half a dozen firmware updates which improves reliability and adds new functionality. I’ve not had a single problem with the camera in the 3 months I’ve been using it and it has even captured an accident.

On a 16GB MicroSD memory card you can get around 2 hours of video at the full 1080p 30fps high quality setting. You can obviously get more if you reduce the quality down to 720p but you need the full HD to get the best quality footage available. The manufacturer recommends a class 6 memory card but I’ve been using a class 10 card without problems.

When you open the software you’ll notice that there’s lots of camera settings to play with. It’s worth having a play with the settings and trying the different options until you’re happy you have the best quality video for how you use it. Like many dash cams, it comes with High Dynamic Range (sometimes called Wide Dynamic Range) which improves the video quality in low-light or at night time. This can compromise the standard video however, since more noise is added to the video. If you rarely drive at night, then it’s best to leave this feature off.

Mobius Camera

After a recent firmware update, motion detection was added to the camera features. This works well but you cannot have motion detection running alongside normal recording. Unlike most dash cams, where the motion detection normally kicks in when you have parked the car, you will need to run the camera with motion detection on all the time which means you may miss out on footage whilst the car has stopped. It’s good to see the manufacturer releasing new firmware and features though – perhaps motion detection will improve over time.

The camera does lack some of the advanced features offered by other dash cams such as GPS maps, LCD screen, speed tracking, or a g-sensor. Event recording is not automatic (normally a g-sensor will automatically sense an impact and lock the video file) but there is a button on the camera which you can press to lock a file. This isn’t a feature I’ve ever used (I always forget which button it is!) so if you need to save a video file you can just stop the camera before it loops and overwrites the footage you want to keep.

Whilst it does lack some of the advanced car camera features, the quality of the full HD 1080p video is astonishing and trumps the top of the range £300+ cameras. It really is excellent both during the day and at night. So, if you’re looking for a small camera which takes exceptional video without the extra features this is the perfect camera.

video without the extra features this is the perfect camera.

Sample Mobius Videos

Sample Daytime Footage
Sample Night-time Footage
Comparison of the Mobius vs. BlackVue DR550
Posted on

Updating your Mini 0801 Firmware (Tutorial)

Updating your Mini 0801 Firmware (Tutorial)


Mini 0801 Black Bullet Review

The Mini 0801 is one of our most popular car cameras, and it’s easy to see why. It records great video, has a handy little LCD screen and hides discreetly in any vehicle. I use one in my car in fact and wouldn’t go anywhere without it nowadays. On the rare occasion that I have to drive somewhere and have forgotten to put the memory card back in it, I feel vulnerable! Strange but true! I feel positive that the time my Mini 0801 isn’t recording, will be the time something happens!! Anyway, I’m rambling…

One way of ensuring your Mini 0801 dashcam is performing at it’s best is to keep the firmware up to date. Firmware is essentially the programming of your camera and manufacturers will release new firmware files as they develop their products so users can update them. This often adds new features and menu options, or fixes known issues and bugs. With each firmware upgrade your product will usually get better and more stable.

Firmware is provided in the shape of a small file that can be downloaded via the internet and uploaded to your camera either via the memory card, or occasionally by plugging the camera into a computer.

The steps below outline how you can update your Mini 0801 dashcam with the latest firmware. Please note: While these instructions are tried and tested, any changes or updates to your firmware are done so at your own risk.

How to check your current Mini 0801 firmware version
If you want to check which version of the firmware your Mini 0801 currently has, you can find this information in the menu. Press ok to stop your camera from recording if necessary and then hold the up button to access the menu. Press up again once the menu is open to highlight the ‘FIRMWARE’ option, then press OK. This will show you the firmware version you currently have.

STEP 1

Download the firmware file that is applicable to your camera. At the time of writing, the latest Mini 0801 firmware for the versions that we offer (without internal memory) is available below, and in the support section of our site. This is version 20131202.

Download: Mini 0801 Firmware (20131202)

STEP 2

Copy the firmware file onto a Micro SD card. If you’re using the one from your camera, format the card first so that the firmware is the only file remaining on it.

STEP 3

Insert the memory card into your Mini 0801 dashcam and turn the power on.

Mini 0801 firmware update

STEP 4

When prompted with ‘FIRMWARE UPDATE?’, press up top highlight YES in red, then press OK.

Mini 0801 firmware update

STEP 5

The screen will then display ‘PROCESSING…’ for a short time and the LED will stay solid blue. If your screen is set to turn off after a minute, it will do so but the update will continue to be carried out. The LED will remain blue until the update is finished (approximately 1m 40s later in our tests) at which point the camera will turn itself off. You may hear the power off tone and the LED will turn off.

Mini 0801 firmware update

STEP 6

Your Mini 0801 is now updated, but before you proceed, remove the firmware file from your Micro SD card to prevent the camera from asking if you want to update your firmware the next time you turn it on.

STEP 7

Re-insert your Micro SD card, power up your camera and check that the latest firmware is installed. You may need to check the menu settings and adjust them as they will have been restored to the default settings.

Mini 0801 firmware update

And that’s it. Told you it was easy, and your Mini 0801 is now bang up-to-date!


Posted on

Our guide to parking protection with real life footage

Our guide to parking protection with real life footage

Parking protection is a popular feature on many dash cams but we’re often asked, just exactly, “what is it?” Does it help you park the car into a tight space? Does it record whilst you’re parked? Read on for our beginners guide to parking protection or watch our video for an overview by the lovely Katie.

If you’ve ever returned to your car in a car park and noticed a dent in the door or even worse, dented and scratched panels, you’ll immediately see the benefit parking protections can bring.

In a nutshell, parking protection is a mode on the camera which continues to record whilst you have parked and left your car. When the camera detects movement in front using motion detection or a shock using a built-in g-sensor, it will record and lock a file so you can play it back later should you need to.

If you’re new to car cameras, they use loop recording so that when the memory card fills up it starts to over-write the oldest footage first, to keep the camera recording. However, a locked file is a video file which won’t get over-written when the card fills up. Generally speaking, parking protection video files are locked so you don’t lose the footage after a few hours of driving. Many cameras also lock files when you experience a sudden change in direction or shock.

Depending on the camera, they usually save the video around 30 seconds before and after the motion/shock was detected. This ensures you have enough video of what happened at the time of the incident. Most cameras will automatically enter into parking protection mode after a few minutes without moving or when the car ignition is switched off but some require you to press a button to manually turn on parking protection mode as you leave your car parked.

Parking protection gives you peace of mind that if your vehicle is damaged when parked up, you can identify and bring the guilty person to justice and avoid claiming on your car insurance or paying for the repairs yourself. The footage can be used for tracking the driver down with the DVLA, making an insurance claim, or reporting the incident to the police. Of course, there is no guarantee that you’ll capture the culprit on camera but you never know. We know at first had how important parking protection can be – check out this video from a camera installed in one of our cars:

For cameras with multiple lenses such as a BlackVue DR550 or the Mi-Witness, the motion detection works for both the front and rear of the car and both angles are recorded and locked for playback later. This can help improve the chances of recording the incident and finding the person at fault.

For parking protection to work effectively, you will need a permanent power supply to the camera rather than connecting via the cigarette lighter socket. Some cameras do have internal batteries but at best they’ll only last an hour, so your recording time will be limited. By hard-wiring the camera to the car battery using one of the hard-wiring kits available you’ll be able to provide permanent power to the camera whilst protecting the battery from discharge.

Depending on where you park, the camera may record lots of footage so you will need to be mindful that the memory card doesn’t fill up with locked files. Some cameras will simply stop recording and others will start to overwrite the oldest locked files first so make sure to check the camera regularly and unlock any files which you do not need.

To sum up, parking protection offers video surveillance around the car when the camera detects movement or shock which can be vital in giving you the evidence you need should something happen to your car whilst parked up. There are lots of camera which offer parking protection so browse our full range of dash cams with parking protection.

Posted on

BlackVue DR550GW-HD Car Camera Review

BlackVue DR550GW-HD Car Camera Review

BlackVue DR550GW-HD Car Camera Review

Posted by Car Camera Shop on Tuesday, 14 January 2014

BlackVue DR550-GW Review Summary

We’ve tested a lot of dash cams here at Car Camera Shop, but never before one with a rear-facing camera. So when Pittasoft offered us a BlackVue DR550GW-HD to review, their first two-channel camera, we jumped at the chance. Having the ability to record behind your vehicle, as well as in front, greatly increases the chances of you capturing any activity that could lead to you needing to claim on your insurance.

Key Features

  • Full HD quality video (1920 x 1080) at 30fps.
  • 139° wide angle lens with a 2.4MP Sony Exmor CMOS sensor.
  • Multi-lens to capture video from front and rear.
  • Wifi enabled to connect to a mobile app.
  • GPS maps for speed and location tracking.
  • G-shock sensor to detect sudden and severe movement.
  • Parking mode for protection when parked.
  • Photo mode.
  • MicroSD cards up to 32GB. 16GB card supplied.
  • Adjustable adhesive windscreen mount.

Upon opening the well-presented packaging, the build and design quality of both cameras is the first thing you notice, certainly in comparison to some of the budget range of cameras available in the market today. Continuing the sleek, barrel design of the existing BlackVue cameras, these are constructed of tough, beautifully finished plastic, with smart little design features, from the subtle placement of status LEDs to the touch-sensitive audio on/off sensor on the front camera. Even the air ventilation holes complement the design beautifully!

BlackVue DR550GW-HD Car Camera

There are also some nice finishing touches such as the BlackVue logo on the lens cap and even etched underneath the adhesive pad on the rear camera that, while not strictly necessary, really do paint the picture that this is a premium quality product. The camera isn’t cluttered with buttons which helps retain its sense of style, but that doesn’t mean that it’s short on functionality either. At one end, a touch-sensitive panel enables you to turn audio recording on and off easily while driving and at the opposite end, alongside the power and rear camera connectors, a single button engages the DR550GW’s own WiFi hotspot. This enables you to access a wealth of setting and options via your smartphone, but we’ll talk more about that later!

BlackVue DR550GW-HD Detail

Installation was easy, and we were impressed with the quality of the cables provided. Every connection felt made-to-measure, particularly the AV in/out cable connecting the two cameras which clicked into place firmly. All cables were long enough to route around the car, completely hidden from view behind the trim and beneath the carpet. The only complication we encountered was the amount of slack cable required to allow our hatchback boot to open. This loop of cable couldn’t be hidden as well as we’d have liked when the boot was closed, but it didn’t cause any visibility issues in the slightest and wasn’t very noticeable.

There’s definitely something very comforting about having a car camera installed. The peace-of-mind that comes from knowing you’ll have footage if anything happens on the road is appreciated. So catching sight of the additional rear camera in our mirror was very welcome. Its subtle white LED let us know that it was powered up and recording.

On powering up the camera for the first time we’re welcomed with a voice message, “BlackVue for your safe driving”. These voice prompts give you updates as to the status of the camera to make sure you it’s all working properly. While they’re a novelty at first, we eventually turned them off, preferring our camera to be seen and not heard. With this in mind, and despite the DR550-GW-HD being bigger than some cameras on the market, the main unit was discreetly hidden behind our rear-view mirror.

BlackVue DR550GW-HD iPhone App

Using the free BlackVue app, available for iOS and Android devices, you can adjust just about anything you could wish to on your camera. From the video brightness and g-sensor sensitivity to the length of videos being recorded and which voice alerts you wish to hear. It also lets you view a live feed of what the front and rear cameras are viewing which is invaluable in positioning them in your vehicle. More importantly, the app is one of the key ways in which you can view the videos that your camera has recorded and we were impressed at how easy it is to use. The video files are easily identified as either ‘normal’, ‘event’ or ‘parking’ and by being either front or rear facing videos. They can be easily filtered so you can access the files you want quickly and easily.

Once playing, the videos streamed well from the camera and the image looked sharp. The view could be switched from front to back seamlessly at the push of a button. Depending on the device you’re using, you might not quite be able to make out registration plate numbers, but rest assured that the detail will be there once you view them on a bigger screen, such as on your PC or Mac.

The software provided is also intuitive and uses the same filtering system as the app to let you find the videos that you’re looking for easily. Using a smart picture-in-picture mechanism, you’re able to view the front and rear-facing footage simultaneously giving you a complete picture of activity around you at the time of any incident. To view more detail, the videos can be viewed at full screen size.

The only issue we found with the footage was that at speed, areas of the video became blocky and pixelated which was disappointing. When stationary, both the front and rear images look very sharp but they quickly deteriorate as the cameras struggle to process the images. This issue is caused by the low bitrate that each camera has. Even updating the camera to the latest firmware, which improved the video quality, we still noticed issues with the image quality. We’ve contacted Pittasoft for comment and will update this review once we hear from them. With the dashcam community happy to feedback to manufacturers to help them develop their products, we’d like to think that future updates will help to resolve this issue.

We also missed the ability to be able to lock video files of our choosing if, for example, something happened on the road around us that we wanted to keep a record of, but that we weren’t directly involved in; for example, a near-miss between other cars on the road or some anti-social behavior. With other dashcams, you can press a button to create an ‘;event’ file which won’t be overwritten by the camera and will be kept safe. It’s purely down to personal preference but we’d like to see this feature on the DR550GW-HD as we regularly use this feature on other test cameras. With so many people sharing video files of their experiences on the road nowadays, this is a very popular feature.

And so, in conclusion, the BlackVue DR550GW-HD really does set the bar high in terms of build quality and features, but has improvements to make in the video quality department. We genuinely hope that future firmware updates will rectify the issues that the camera currently has, at which point this camera has the potential to become one of the best cameras on the market.

Sample footage: Front view

Sample footage: Rear view

Sample footage: BlackVue HD Software

Note: the software footage above appears jerky due to our screen capture software. On-screen the footage is perfectly smooth.